Creating an Interface/Channel
How to create an interface or channel for your first microapp.
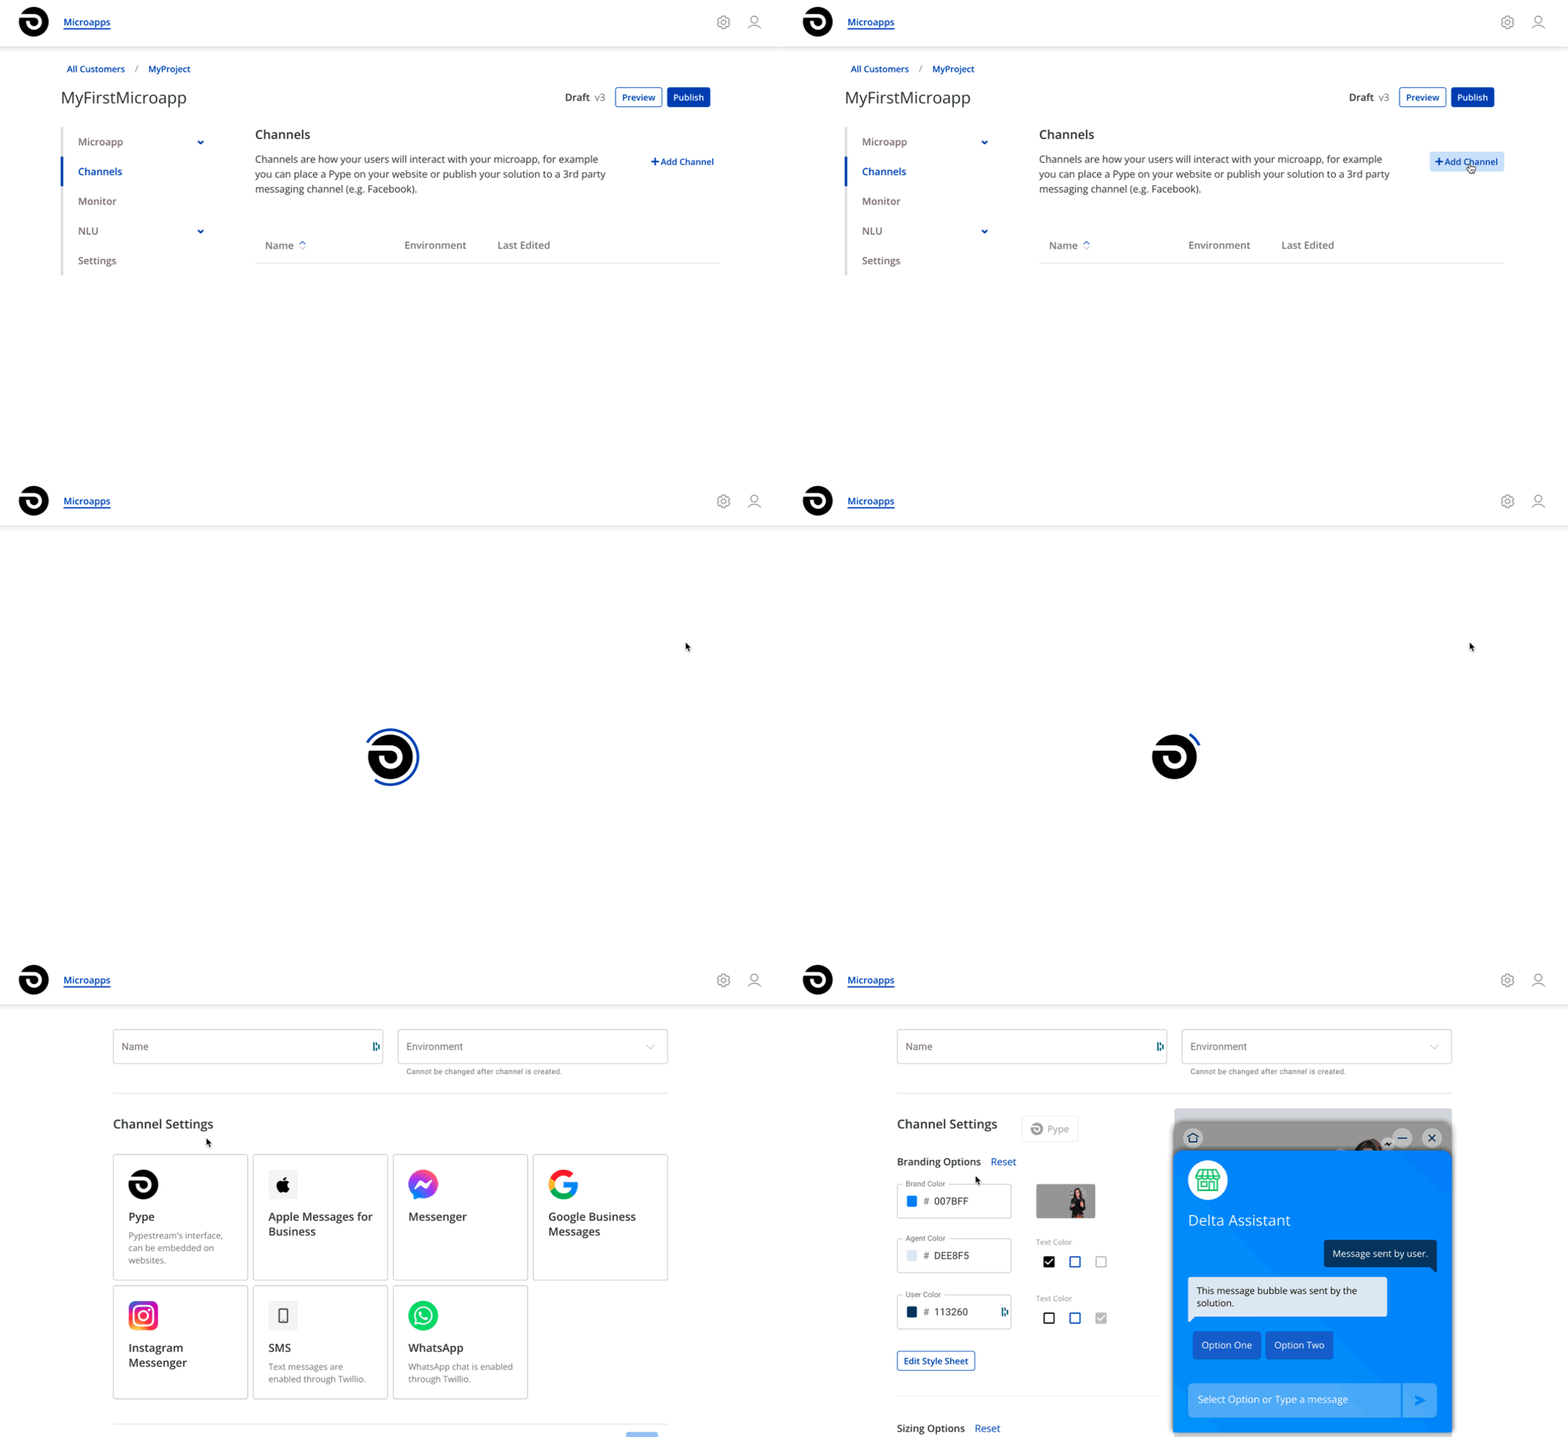
To create an interface simply head over to the Channels tab within your Microapp's Manage section.
Creating & Personalizing a Pype Interface
In the Channels tab, you will be able to view all existing interfaces/channels. In our case, we want to create a new one. We can do this simply by clicking on Add Channel.
A selection to choose the type of channel will open, allowing us to select from Pypes (Interface) and other 3rd Party Messaging Channels such as Messenger, Instagram, Google, Apple, SMS, Whatsapp, and more.
Let's go ahead an select Pype as shown below:

After selecting Pype, we will be taken to a page where we can provide a few details:
- Name
- Environment
- Style & Customizations
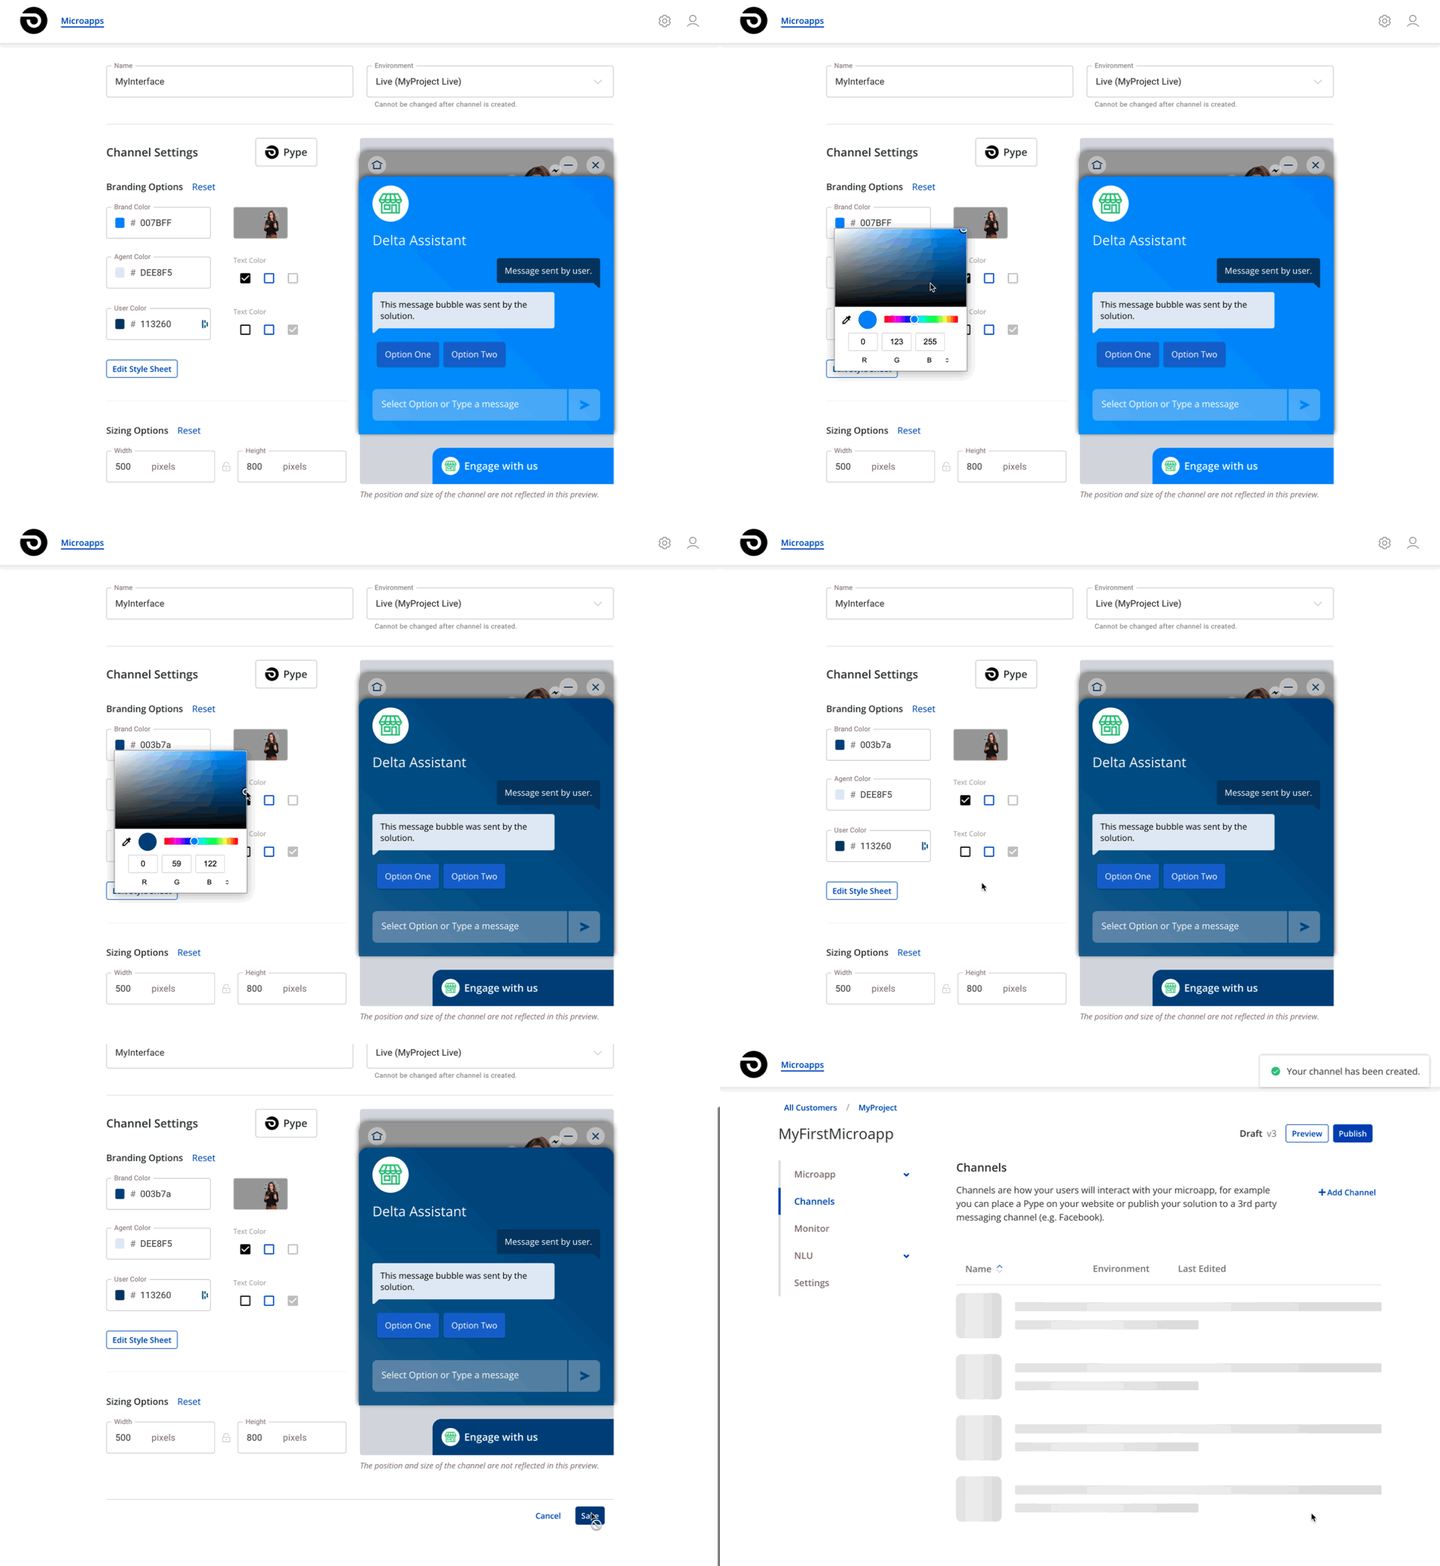
Let's go ahead and call our Pype MyInterface and select from our available Environments (which should have already been configured as part of the prerequisites for this guide).
Feel free to customize the colors of your interface, or even upload an image to personalize the Brand Moment. Once you're done with changes, simply click on Save to create your interface.

Running/Previewing Pype Interface
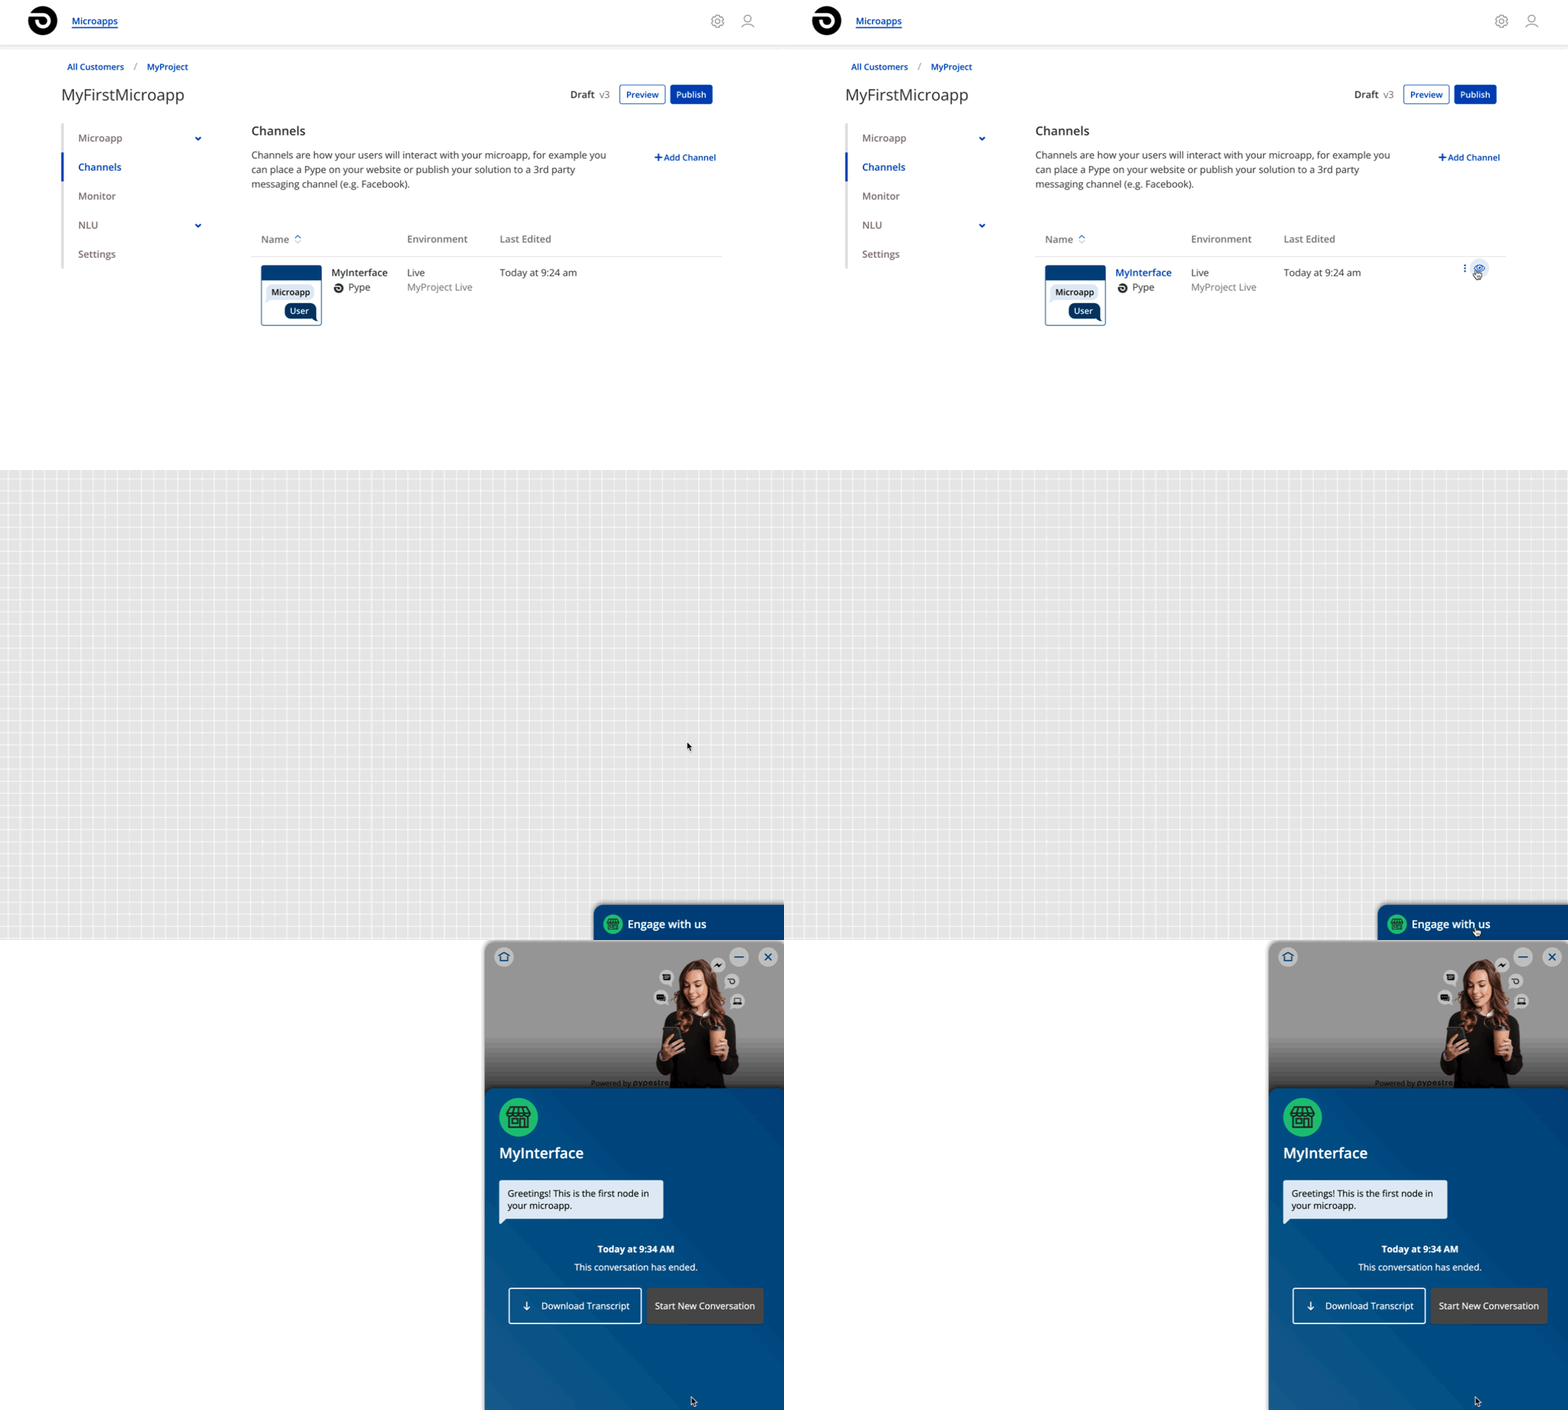
After you've successfully created an interface, you can easily view it in action by clicking on the Eye icon next to it. This will open your interface in a new tab, and allow you to run your Microapp within it.

Congratulations, if you've made it this far, it means your Microapp is now running within a Pype interface and is ready to be shared with the world.
From here, there are two ways that you can expose this to end-users:
- Sharing a URL (simply copy the URL that opened for you in a new tab)
- Embedding Pypes on Your Own Site
Updated over 3 years ago
