Connect AWS Connect
Enable AWS Connect for Pypestream Live Agent (Customer Side)
Overview
This document is an overview of how to enable a live chat connection from AWS Connect to Pypestream. In order to do this, you will need to retrieve certain information from your AWS instance to provide to your PypeX team. There are also configurations you need to enable or set up in your instance to ensure messages get routed correctly once the connection is enabled.
Here is a list of all the credentials you will need to provide to your PypeX team.
- Retrieve Region
- Create & Retrieve SNSTopicARN
- Retrieve instanceId
- Retrieve queueID
- Retrieve contactFlowId
AWS Prerequisites
- An Amazon Connect Instance must be created (see documentation)
- A Queue must be created for chats to route to (see documentation)
- A basic Inbound Flow must be created (see documentation)
For help or guidance in setting up your Amazon Connect instance, please refer to the AWS documentation linked above.
For more guidance on how to enable your Amazon Connect instance to integrate with Pypestream, you can also refer to our set up video to see exactly how to retrieve the information outlined in this document.
Retrieve AWS Region
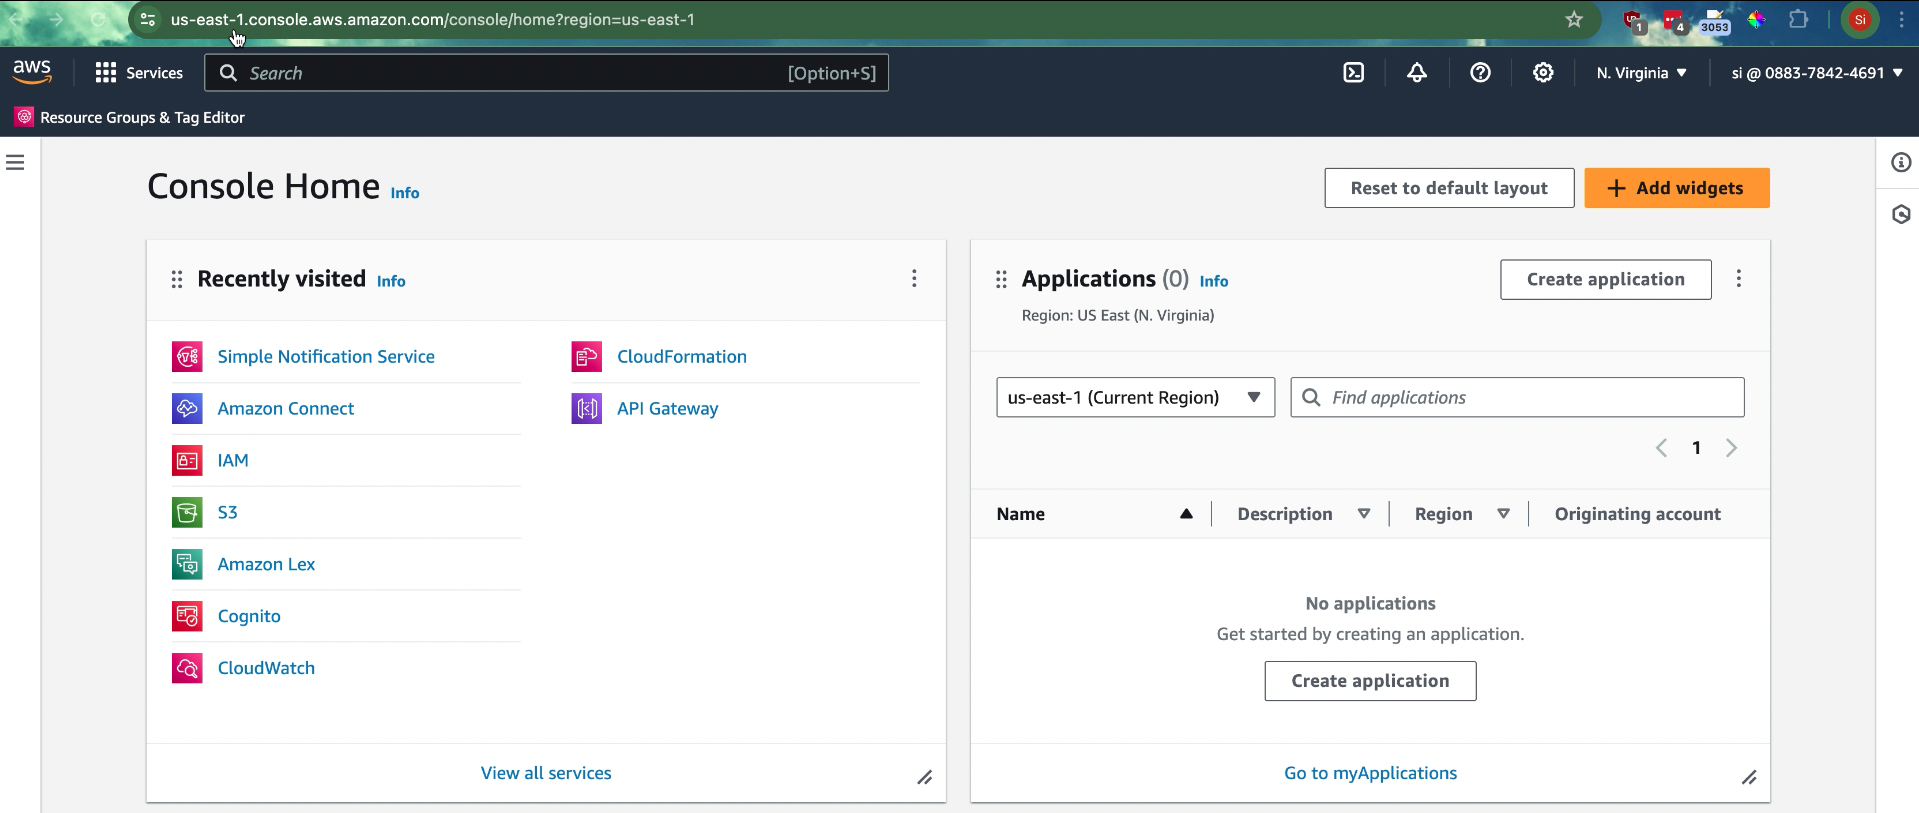
- Login and go to your Console Home in your AWS instance
- Grab the region in first part of the url
- In the example below, this would be us-east-1. Provide this value to your PypeX Team.
Create & Retrieve SNSTopicARN
-
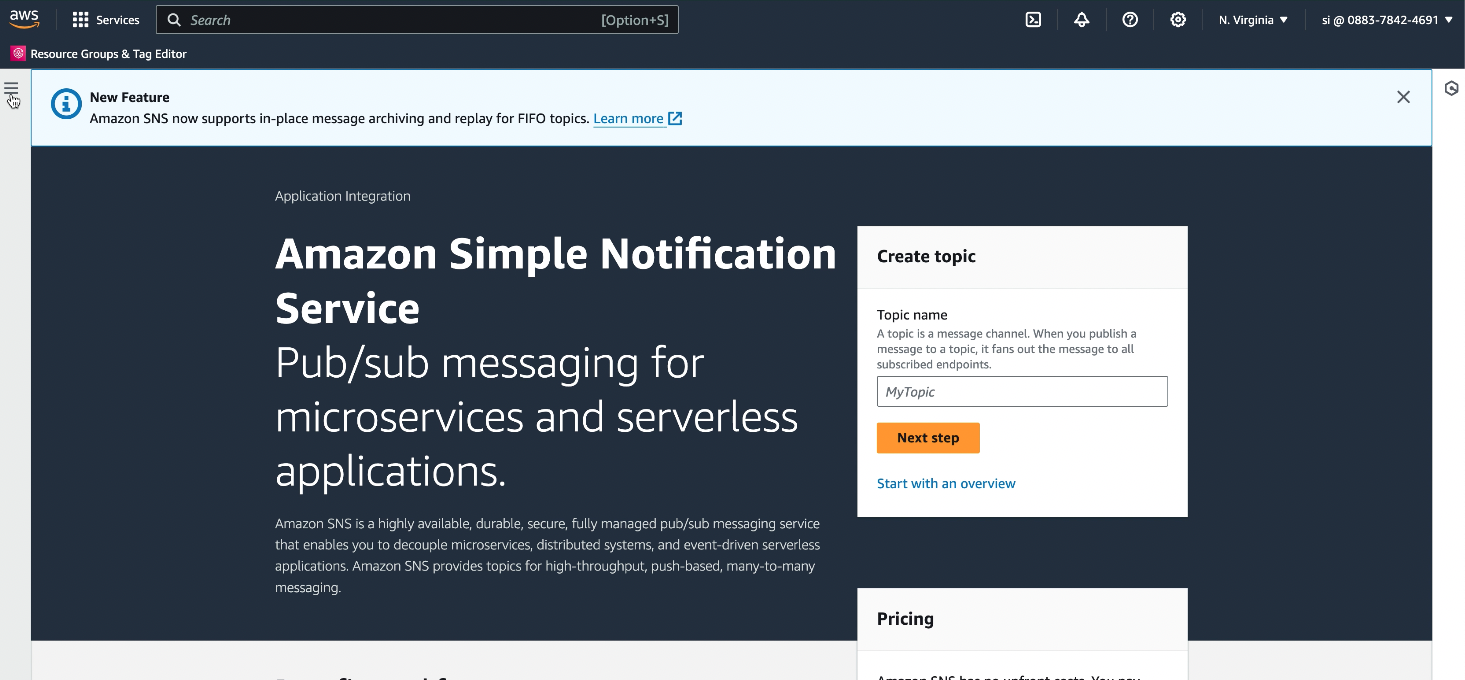
Go to the search bar at the top of the page in Console Home and type “sns”
-
Select “Simple Notification Service” (should be the first result)
-
In the top right corner of the Simple Notification Service home page, click the hamburger menu:
-
In the drop down menu, select Topics
-
Click the orange Create topic button
- Set the name of the topic as cxsccc
- Set the type as Standard
- Save
-
The ARN will generated automatically. Provide this value to your PypeX Team:

Configure your SNS Topic to Pypestream’s Contact Center Connect Webhook
Once you have created your SNS Topic, you will need to create a subscription:
-
Go to the Topics menu (see instructions above)
-
Select the cxsccc Topic you created in the last section
-
Select the orange Create Subscription button
-
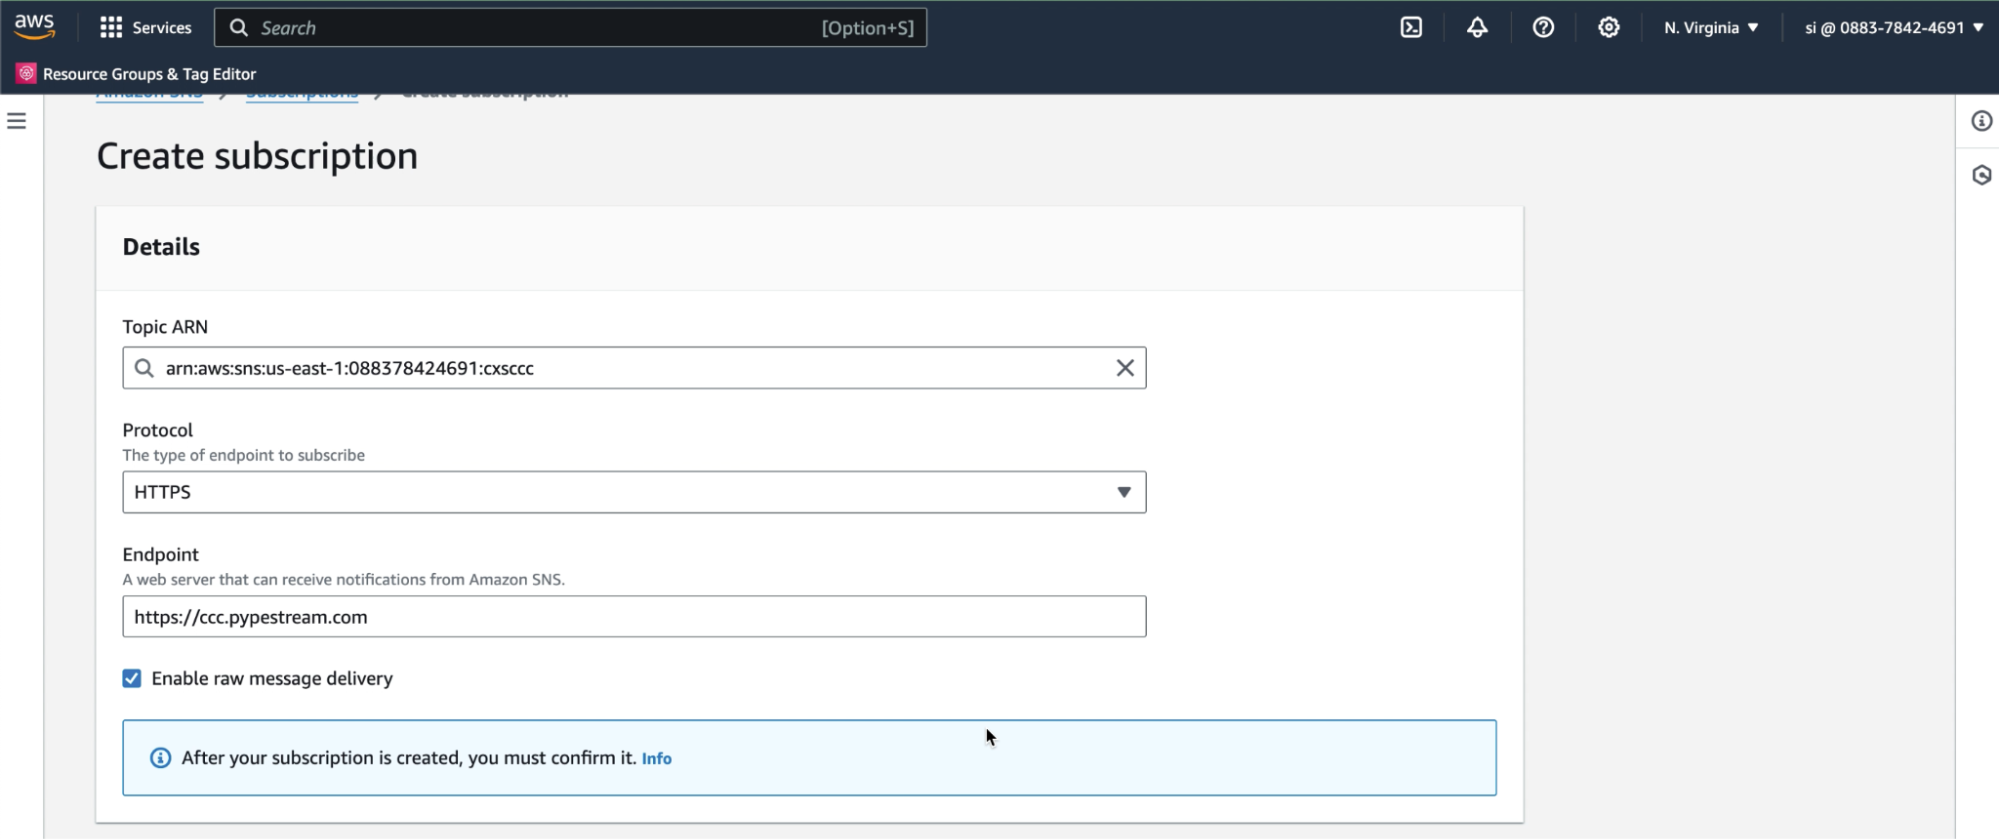
The Topic ARN will autofill, leave this as is
-
Under Protocol select HTTPS from the dropdown
-
Under Endpoint enter: https://ccc.pypestream.com
-
Check Enable raw message delivery:
-
Scroll down and select Create Subscription
-
Retrieve instanceId
-
From Amazon Console Home page, type “Amazon Connect” into search and select Amazon Connect from the results
-
Select the instance you created to connect to Pypestream
-
Under Account overview, look under Distribution settings
-
Copy the alphanumeric id at the end of the Instance ARN path and provide this value to your PypeX Team:

Add an Amazon Connect Instance
If you haven’t already, be sure to Add an Amazon Connect Instance that will be dedicated to Pypestream live chat escalation. We always recommend Creating a Dev/Sandbox Environment to facilitate testing before moving to production. If you haven’t done this yet, please refer to the Amazon documentation linked above to complete these steps. Once done, follow the steps below to retrieve necessary information for your PypeX team.
Retrieve queueID
-
From Amazon Console Home page, type “Amazon Connect” into search and select Amazon Connect from the results
-
Select the instance you created to connect to Pypestream
-
Under Emergency Access, select the link Log in for emergency access. A new browser will open (NOTE: this is a short cut for admins to get into the Amazon Connect instance, there is no harm doing it sparingly for configuration purposes)
-
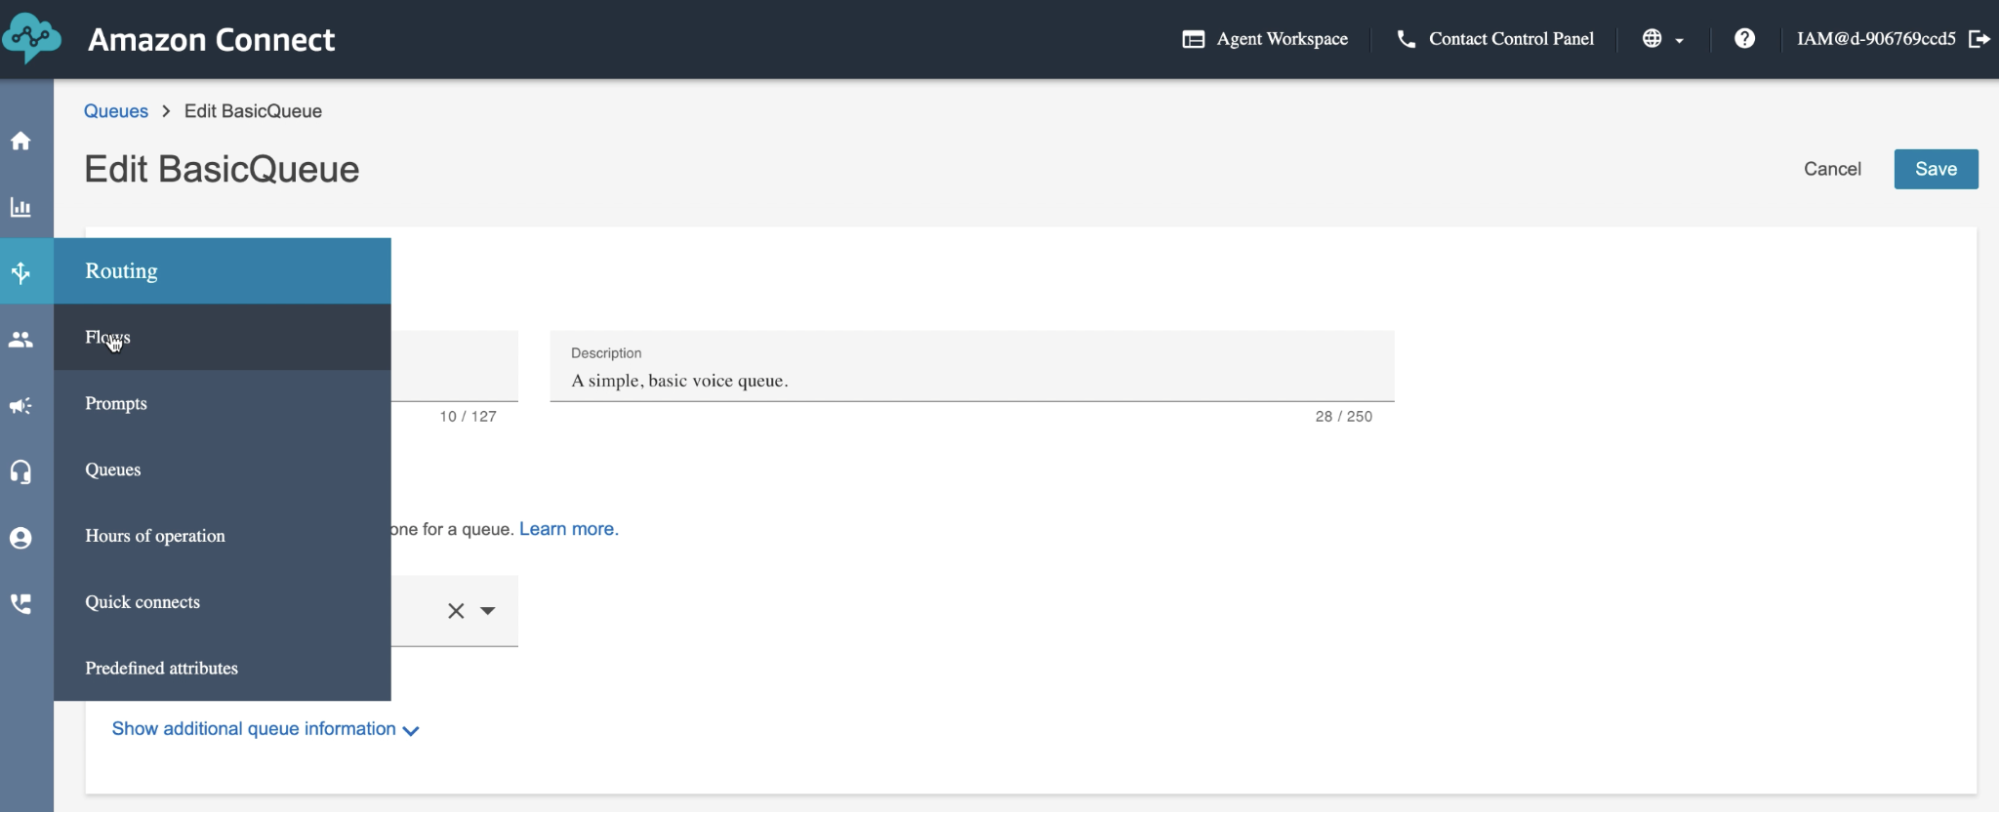
In the Amazon Connect instance, go to Routing from the menu on the left hand side and select Queues:

-
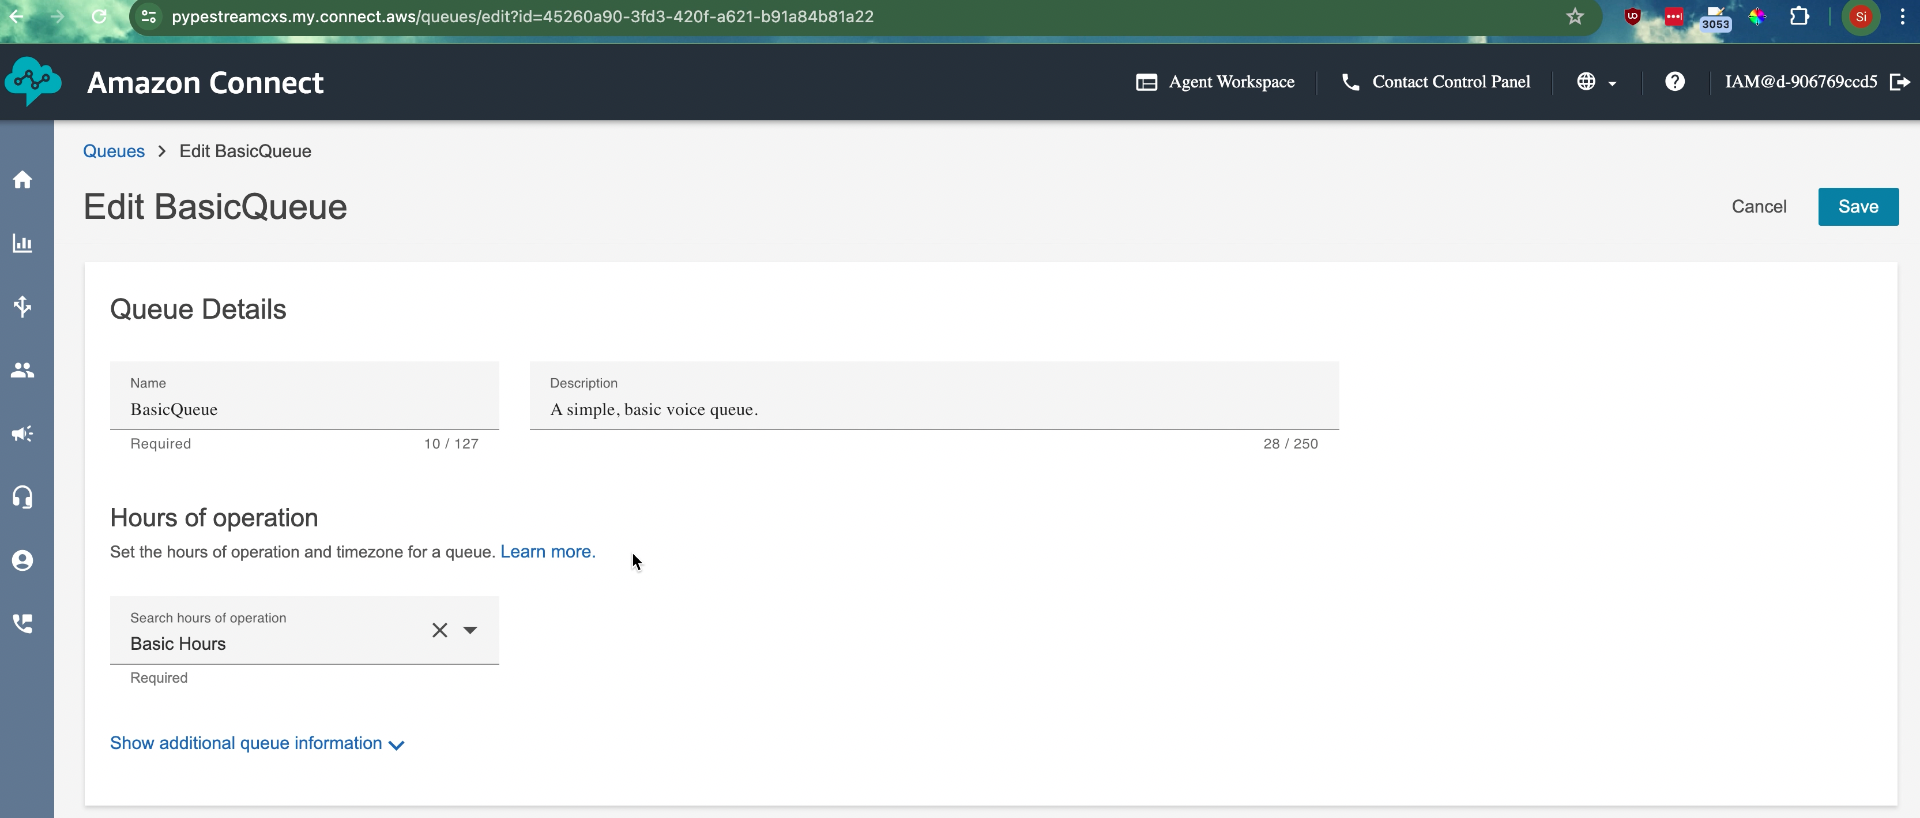
Click on the Queue you would like Pypestream to send chats to
-
At the very top of url, copy the alphanumeric id at the end:
Retrieve contactFlowID
-
From Amazon Console Home page, type “Amazon Connect” into search and select Amazon Connect from the results
-
Select the instance you created to connect to Pypestream
-
Under Emergency Access, select the link Log in for emergency access. A new browser will open (NOTE: this is a short cut for admins to get into the Amazon Connect instance, there is no harm doing it sparingly for configuration purposes)
-
In the Amazon Connect instance, go to Routing from the menu on the left hand side and select Flows:
-
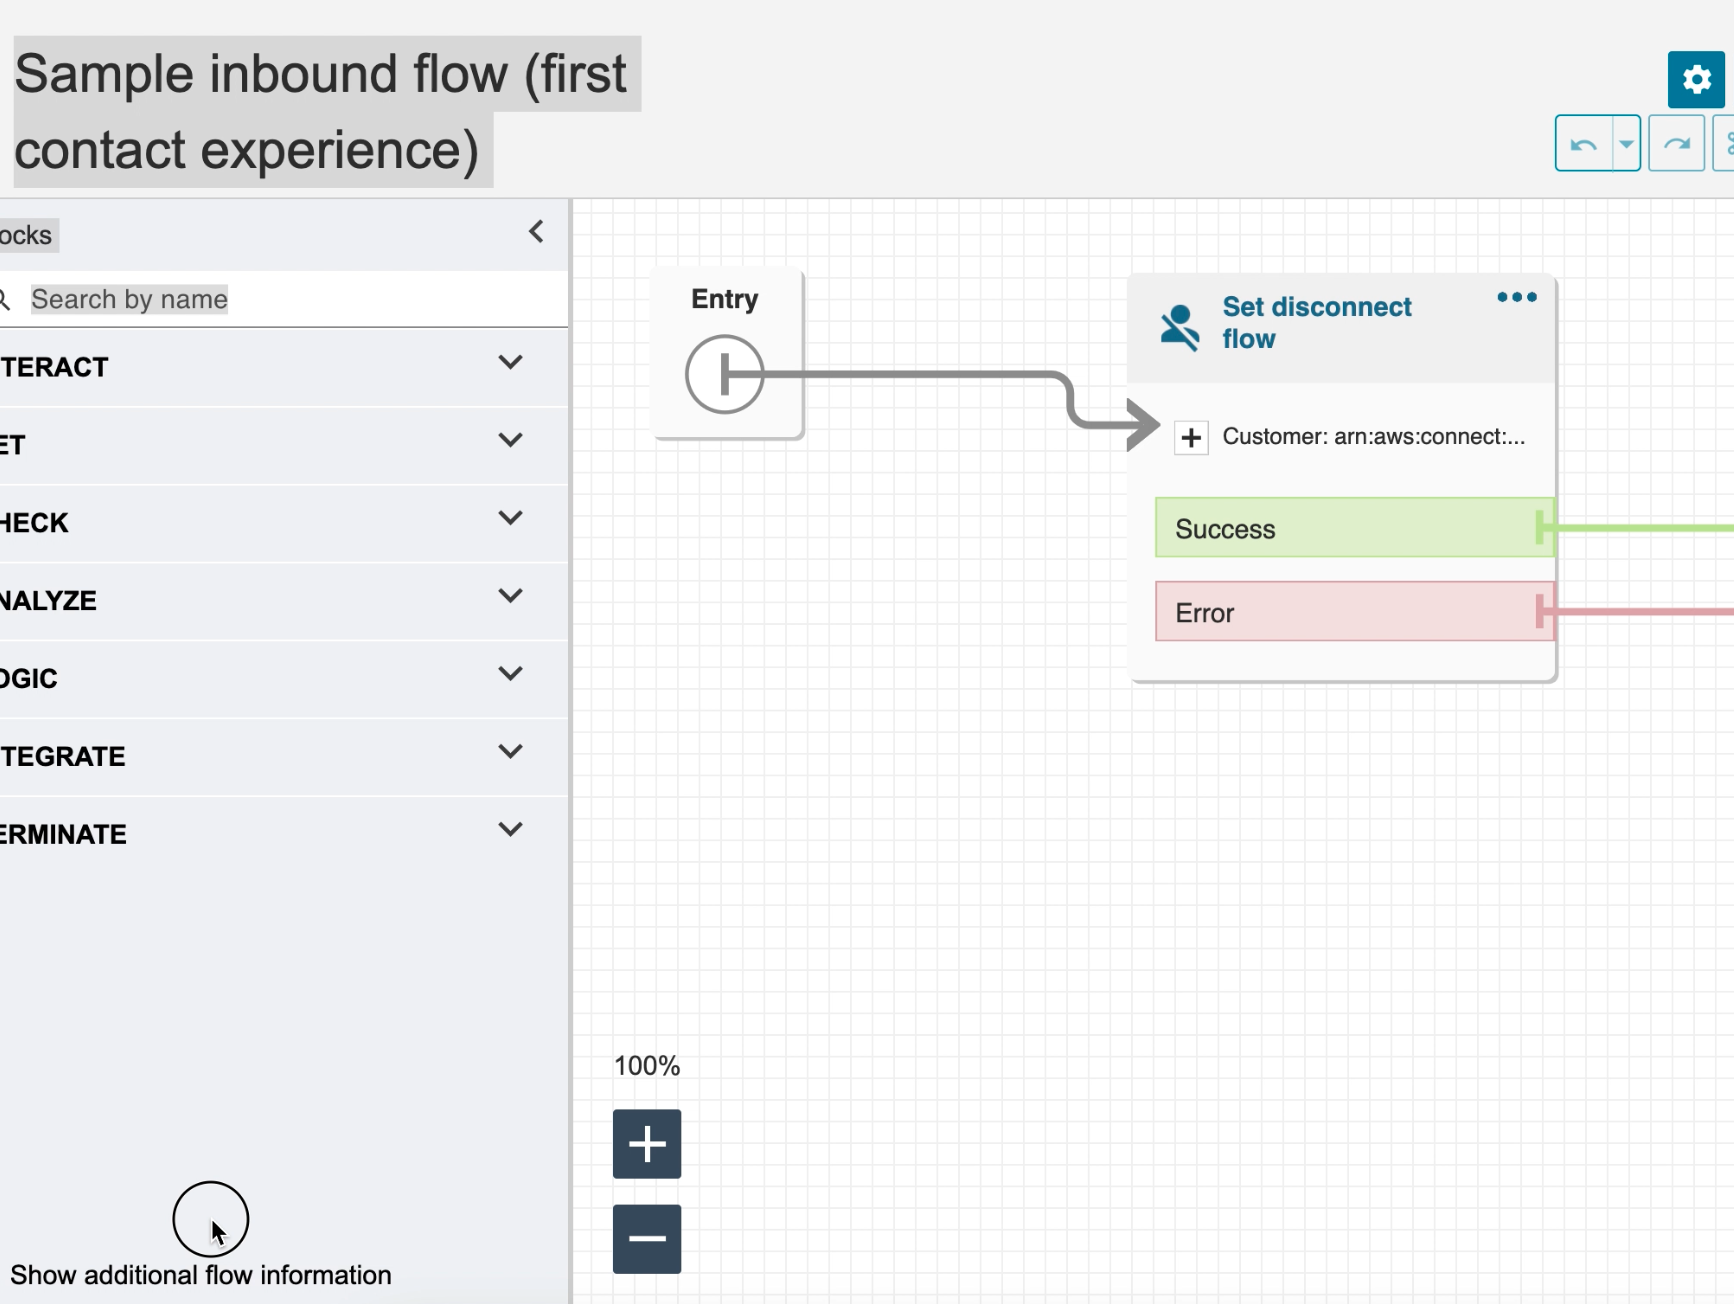
Select the Inbound Flow you created to route traffic to the correct Queue
-
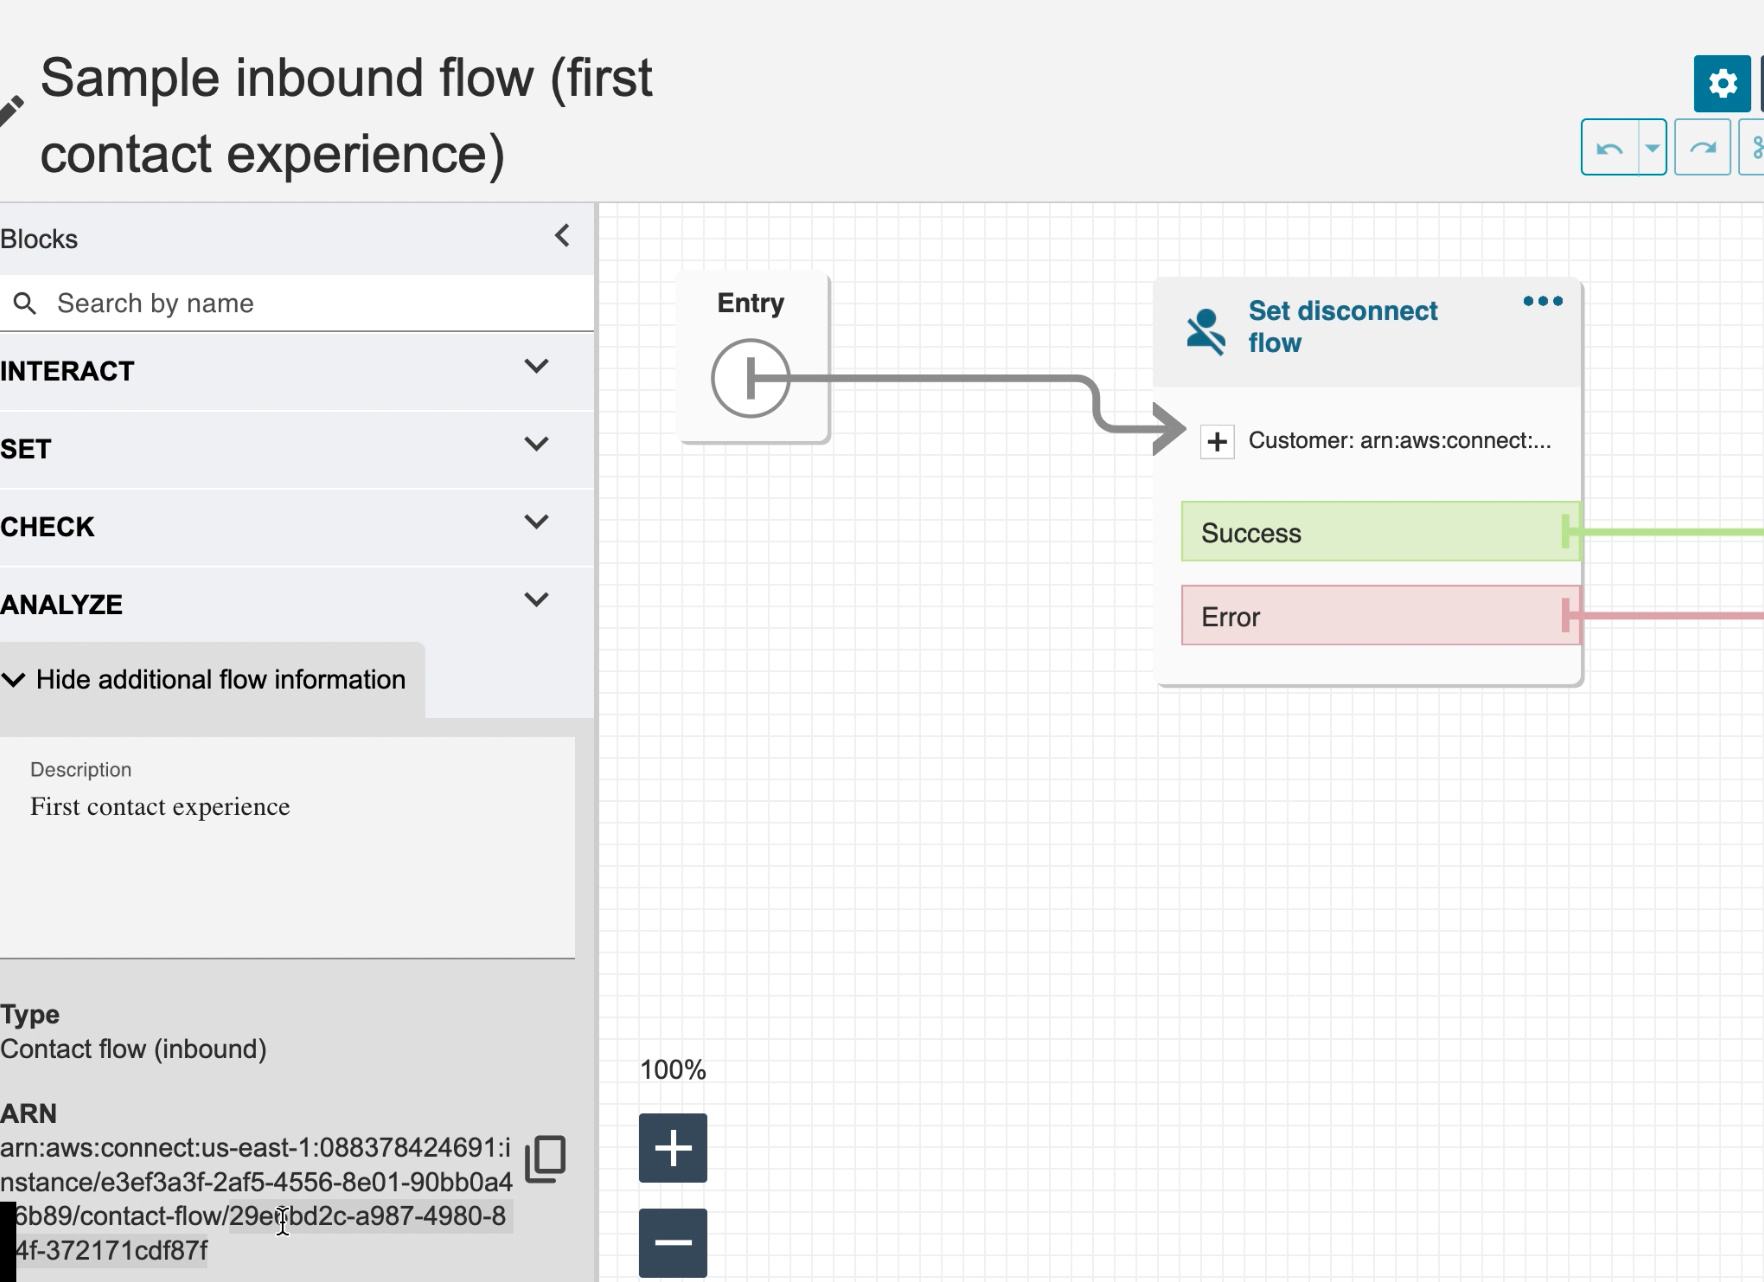
At the very bottom of the Flow Menu, click on the up arrow that says Show additional flow information:
-
Copy the alphanumeric id at the very end of the ARN path and provide this value to your PypeX Team:
Updated 10 months ago